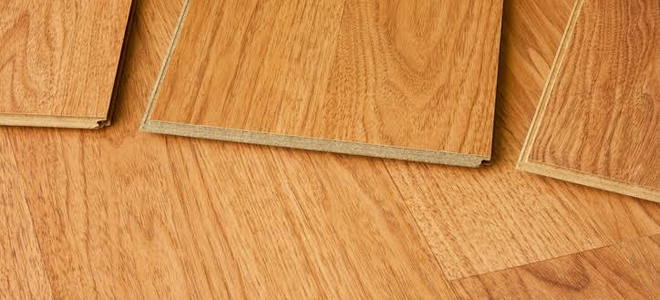
Which Side Start Laying With Tongue Groove Hardwood Flooring

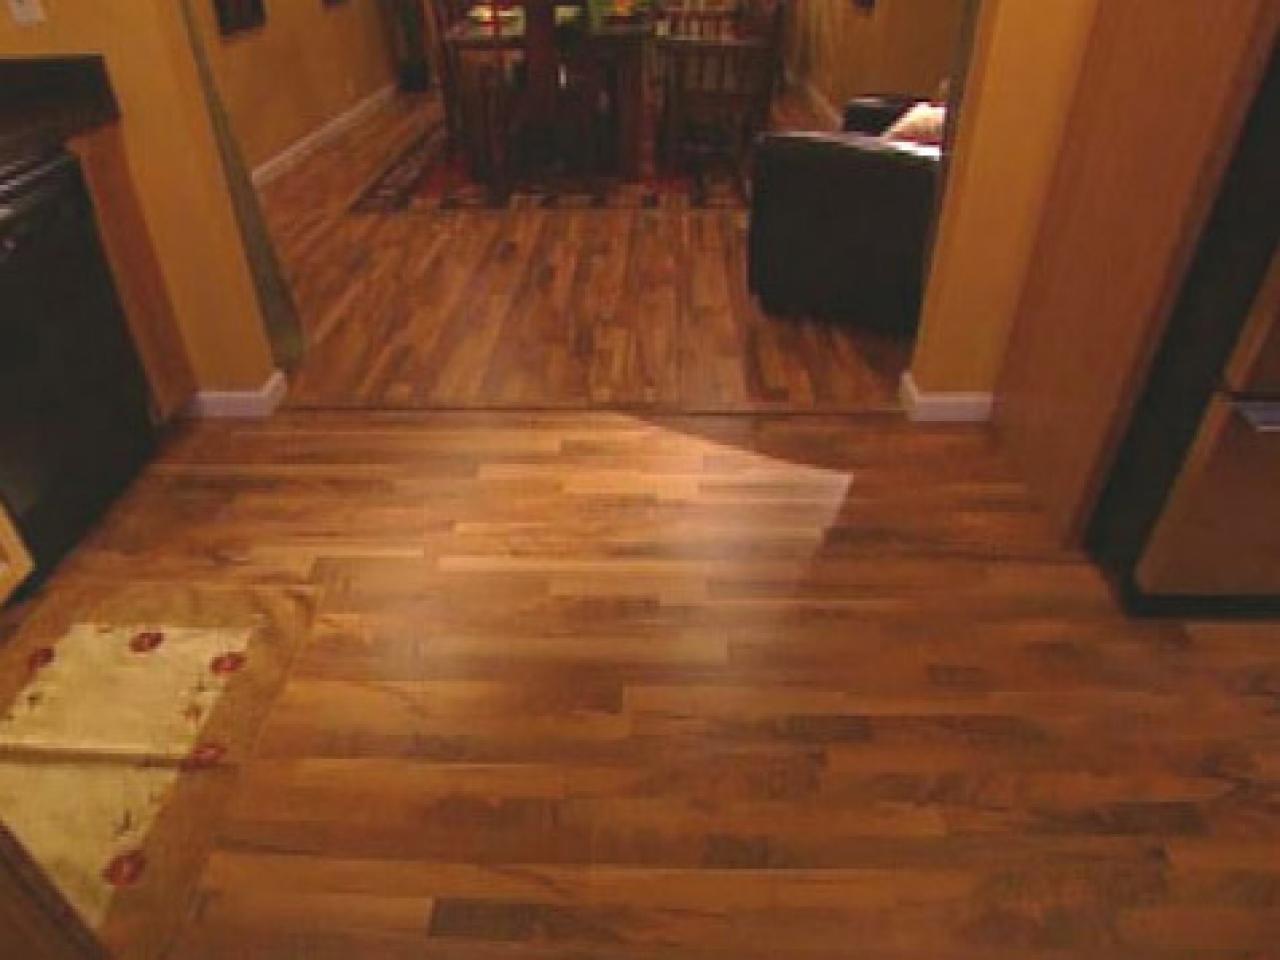
Wood Floor Transition Photo Hardwoodfloortransition Jpg Flooring Hardwood Floors Hardwood In Kitchen

Tongue And Groove Vs Click Wood Flooring Direct Wood Flooring Blog

How To Install An Engineered Hardwood Floor In 2020 Diy Flooring Engineered Wood Floors Diy Hardwood Floors
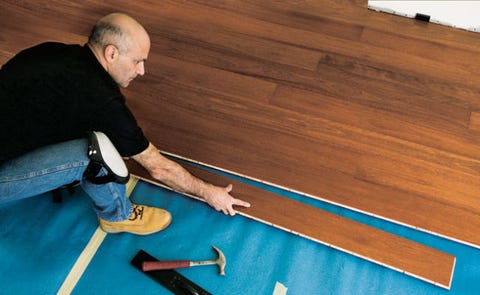
Install Tongue And Groove Wood Veneer Flooring Hgtv

Pin On Reclaimed Wood Floor

Patterson Custom Homes On Instagram Upside Down Or Right Side Up Your Eye Might Be Trying To Play A Trick On You French Custom Homes Home White Oak Floors

Installing 6 mil polyethylene install the polyethylene parallel to the direction of the flooring and allow a 3 overhang at the perimeter.
Which side start laying with tongue groove hardwood flooring.

Actual Renovation Maybe Installing New Rustic Laminate Floors In Our First House Building Our Rez Video Video Rustic Laminate Flooring Laminate Flooring Flooring

Go To The Lumber Yard Buy 1 Thick X 10 Wide Premium White Pine 8 Boards At 0 85 Linear Foot Hand Sand All The Edge Flooring Diy Flooring Home Remodeling

Hardwood Flooring Laid Out On A Floor In 2020 Porch Ceiling Hardwood Floors Flooring

Sa Pine Tongue Groove Flooring

Different Hardwood Floors In Adjoining Rooms Google Search Old Wood Floors Flooring Hardwood Floor Colors
How To Install A Hardwood Floor How To Build A Hardwood Floor This Weekend
How To Lay Floating Tongue And Groove Flooring Part 1 Doityourself Com

Oak Engineered Wood Blocks Laid In A Herringbone Design Woodflooringinterior Engineered Wood Floors Hallway Flooring Flooring Inspiration

Laminate Floor Installation Tips Laying Laminate Flooring Flooring Diy Flooring

Pine Floors Pine Boards Not Tongue And Groove In 4 5 6 8 10 And 12 Inch Widths Stained With Olympic Dark Ash Ex Log Cabin Remodel Pine Floors Staining Deck

How To Install An Engineered Floor

Pin On Diy Cutting Board

Take A Satirical Journey From No Renovation Skill To Diy Laying Installing Sound Barrier Rustic Laminate Flooring Laminate Flooring Wood Floors Wide Plank

Project Guide Diy Home Improvement Home Repairs Flooring

How To Lay Hardwood Floor With A Contrasting Border Installing Hardwood Floors Hardwood Floors Birch Floors

Mind Blowing Photo Look At Our Review For Even More Inspirations Wideplankoakfloor In 2020 Wood Floors Wide Plank Wood Floor Kitchen Oak Floors

Mafi Fresco Range Bathrooms Wood Floors Wide Plank Natural Wood Flooring Wide Plank Flooring

Problems With Wood Filler How Not To Fill Gaps In Hardwood Floors Flooring Hardwood Floors Hardwood Floor Repair
3
Source : pinterest.com
